Professional Appliance Repair Services You Can Rely On

Factory Certified Licensed technicians

Factory Certified 

Licensed technicians with over 15 years of experience.

Factory Certified Licensed technicians

Complete Warranty

Each repair is covered by


Factory Certified Licensed technicians

Certified Contractor

Fully certified in gas appliances service, repair & installation

Expert Appliance Repair Services by Authorized Appliance

Welcome to Authorized Appliance, your trusted partner for professional appliance repair services. Our team of skilled technicians is dedicated to providing top-notch solutions for all your appliance needs, ensuring reliability and efficiency with every service. Whether it's your
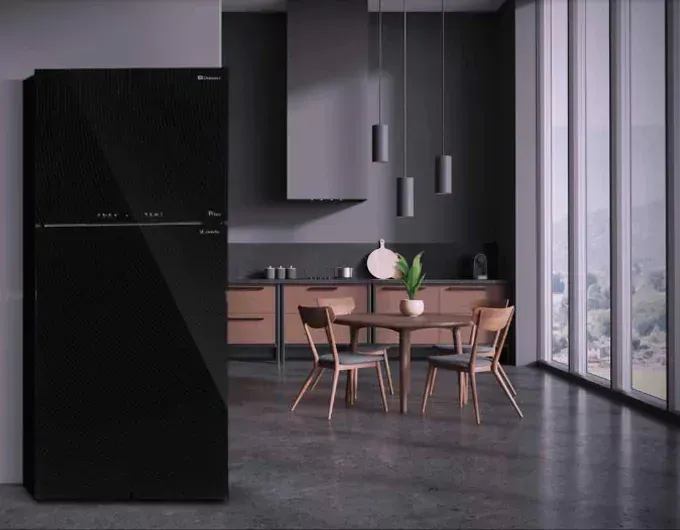
 refrigerator, 
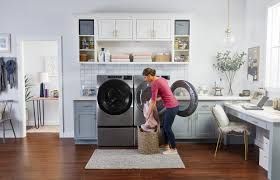
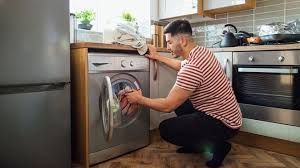
washing machine, or any other household appliance, we guarantee a seamless repair experience tailored to your specific requirements.

Our Services: Tailored Solutions for Every Appliance

From the essential refrigerator that keeps your food fresh, to the indispensable washing machine that tackles your laundry needs, our expertise at Authorized Appliance extends across a wide spectrum of household appliances. Our services are not limited to just these; we also expertly handle ovens, dishwashers, dryers, and more, ensuring every appliance in your home is functioning at its best.

  • a black and white icon of stove on a white background
  • Comprehensive Brand Support at Authorized Appliance

    Explore our extensive range of supported brands at Authorized Appliance, where we cater to a diverse array of household names in appliance manufacturing. Our expertise covers a wide spectrum, from classic to contemporary brands, ensuring that no matter what appliance you own, we have the skills and knowledge to provide maintenance services. Browse through our brand showcase to find your appliance's manufacturer, and rest assured that our experienced technicians are equipped to handle any issue with precision and care. At Authorized Appliance, we're committed to delivering quality service for every brand, ensuring your appliances are in the best hands.

    Frequently Asked Appliance Questions at Authorized Appliance

    Find answers to common appliance dilemmas in our Frequently Asked Questions (FAQs) section at Authorized Appliance. This carefully curated guide addresses a wide array of typical issues you might encounter, from non-draining dishwashers to malfunctioning garbage disposals. Our FAQs offer clear, expert advice and practical solutions to help keep your home appliances in peak condition. And if you have more complex queries or need further insights, our extensive FAQ page is just a click away, featuring a broader range of questions and detailed answers to ensure your appliance concerns are thoroughly resolved.

    • Why is My KitchenAid Refrigerator Frozen on the Back?

      If your KitchenAid refrigerator has ice or frost build-up on the back, there could be several potential causes:


      Door Seal Issues: If the door seal is damaged or not sealing properly, warm air can enter the refrigerator, leading to condensation and frost buildup. Check the door seals for any signs of wear or damage.


      Defrost System Malfunction: Modern refrigerators have an automatic defrost system that periodically melts away any frost that accumulates on the evaporator coils. If this system is not working properly, due to a faulty defrost heater, timer, or thermostat, ice can build up on the back of the unit.


      Temperature Setting: If the refrigerator is set to a very cold setting, it might cause excessive cooling and lead to frost buildup. Try adjusting the temperature setting to see if it resolves the issue.


      Blocked Air Vents: Make sure that the air vents inside the refrigerator are not blocked. Blocked vents can cause cold air to settle at the back, leading to frost buildup.


      Frequent Door Openings: If the refrigerator door is opened frequently or left open for long periods, humid air can enter and lead to condensation and frost.


      Overloading: Overloading the refrigerator can restrict airflow, causing cold air to accumulate at the back and freeze.


      Faulty Thermostat: A thermostat that isn’t functioning correctly can cause the refrigerator to overcool, leading to frost buildup.


      Evaporator Fan Issues: The evaporator fan circulates air over the cooling coils. If this fan is faulty, it can lead to uneven cooling and frost buildup.


      To address these issues, you might start with the simpler checks like door seals, temperature settings, and ensuring proper airflow. If these don’t resolve the problem, it may require a more in-depth examination of the defrost system or other components, which might necessitate professional assistance.

    • How Do I Reset My Whirlpool Washing Machine?

      Resetting a Whirlpool washing machine can often resolve minor issues such as software glitches, unresponsive controls, or error codes. The process for resetting can vary slightly depending on the specific model of your Whirlpool washer, but the general steps are as follows:


      1. Unplug the Machine: Start by unplugging the washing machine from the electrical outlet. This is an important safety step and initiates the reset process.


      2. Wait for a Reset Period: Leave the machine unplugged for about 1 minute. This brief period allows the electrical charge to dissipate from the washer, clearing any retained data that might be causing issues.


      3. Plug the Machine Back In: After waiting for a minute, plug the washing machine back into the electrical outlet.


      4. Open and Close the Door: If your model has an electronic control panel, open and close the washing machine door 6 times within a 12-second period. This action can help to reset the electronic components.


      5. Turn the Machine On: Power on your washing machine. Check if the washer is functioning normally or if any error codes are still displayed.


      6. Perform a Test Cycle: Run a short wash cycle without any laundry in it to ensure the machine is operating correctly.


      If your Whirlpool washing machine has a specific reset button or sequence, it would be detailed in the user manual for your particular model. In case the standard reset process doesn’t work, or if the washer continues to display error messages, it may indicate a more serious issue that requires professional attention or service.

    • Why is Water Leaking from Underneath My Sub-Zero Appliance?

      Water leaking from underneath a Sub-Zero appliance, such as a refrigerator or freezer, can be caused by several issues. Here are some common reasons for such leaks:


      1. Clogged Defrost Drain: The most common cause of water leakage in refrigerators and freezers is a clogged defrost drain. Over time, food particles and other debris can clog the drain hose, leading to water buildup and eventual leakage onto the floor.


      2. Damaged or Loose Water Line: If your Sub-Zero appliance has an ice maker or water dispenser, check the water lines for any signs of damage or looseness. A cracked or improperly fitted line can cause water to leak out.


      3. Drip Pan Overflow: Sub-Zero appliances have a drip pan where water from the defrost cycle collects and then evaporates. If this pan is overflowing, it could be due to excessive condensation or a problem with the evaporation mechanism.


      4. Door Seal Issues: Damaged or worn-out door seals can cause condensation to form inside the unit, leading to water accumulation and leakage. Ensure that the seals are intact and creating a proper seal.


      5. Improper Tilt: Refrigerators and freezers should be slightly tilted backward to allow water to drain correctly into the pan. If the appliance is not leveled or is tilted forward, it might cause water to leak out the front.


      6. Evaporator Coil Problems: Issues with the evaporator coils, such as frost buildup, can lead to water leakage. This might indicate a problem with the appliance's defrost system.


      7. Condensation: In high humidity environments, excessive condensation can occur, leading to water leakage. This is more common in older models.


      To address these issues, start with the simpler checks like inspecting the door seals, ensuring the appliance is properly leveled, and checking for any visible damage to water lines. Cleaning the defrost drain and checking the drip pan are also relatively straightforward tasks. However, if the problem persists or involves more complex components like the evaporator coils, it's advisable to consult a professional technician, especially given the specialized nature of Sub-Zero appliances.

    • Why is My Dishwasher Not Draining?


      If your dishwasher is not draining properly, there are several potential causes to investigate:


      1. Clogged Filter: Modern dishwashers have a filter to catch food particles. If this filter becomes clogged, it can impede water drainage. Regularly cleaning the filter is important for maintaining your dishwasher's performance.


      2. Blocked Drain Hose: The drain hose, which connects the dishwasher to the kitchen drain, can become blocked with food particles or grease. Check for any kinks or blockages in the hose.


      3. Garbage Disposal Issues: If your dishwasher drains through the garbage disposal, make sure the disposal is clear. A clogged disposal can prevent water from draining out of the dishwasher. Also, if you've recently installed a new disposal, ensure the drain plug inside the connection to the dishwasher has been removed.


      4. Check Valve Issues: The check valve, which prevents backflow into the dishwasher, might be stuck. If this valve is malfunctioning, it could prevent water from draining.


      5. Air Gap Blockage: If your sink has an air gap, it can become clogged with debris, causing drainage problems. The air gap should be cleaned regularly.


      6. High Loop Issue: If your dishwasher does not have an air gap, the drain hose should be looped up high under the sink to prevent sink water from backflowing into the dishwasher. If this loop falls down, it can cause drainage problems.


      7. Faulty Drain Pump: The drain pump uses an impeller to force water through the drain hose. If the pump is faulty or the impeller is damaged, the dishwasher won’t drain properly.


      8. Control System Issues: Sometimes the problem might be with the dishwasher's control system. A malfunction in the control panel or timer could prevent the activation of the drain cycle.


      9. Drain Solenoid Failure: Some dishwashers use a drain solenoid to open the drain valve. If this solenoid fails, the valve might not open for the water to drain out.


      10. Blocked Drain Valve: The drain valve can get blocked with debris. This valve should open to allow water to drain out during the dishwasher's drain cycle. If it's stuck, it will prevent proper drainage.


      To troubleshoot, start with the simplest solutions like checking the filter and drain hose. If the issue is not resolved, it may require more in-depth investigation or the assistance of a professional technician, especially if it involves electrical components like the drain pump or control system.

    • Why Won’t My Garbage Disposal Run?

      If your garbage disposal won't run, there are several potential issues to consider:


      1. Power Supply Issues: Check if the disposal is properly plugged in and if the outlet is working. You can test the outlet by plugging in another appliance to see if it gets power.


      2. Tripped Circuit Breaker: Look at your home’s circuit breaker or fuse box. If the circuit for the disposal has tripped, reset the breaker or replace the fuse.


      3. Reset Button: Most garbage disposals have a reset button located at the bottom. If the disposal overheats or is jammed, it may trip this internal breaker. Turn off the disposal, press the reset button, and then try to run it again.


      4. Jammed Disposal: If the disposal is jammed, it won’t run. Turn off the power to the disposal at the circuit breaker and use an Allen wrench to manually turn the motor by inserting it into the hole at the bottom of the disposal unit. This can help to dislodge any items that are stuck.


      5. Faulty Switch: The wall switch that operates the disposal could be faulty. A simple test is to replace the switch or use a voltage tester to check for power at the switch.


      6. Damaged Motor: If the motor of the disposal is damaged or burnt out, the unit won't run. In this case, the disposal may need to be repaired or replaced.


      7. Wiring Issues: Loose or damaged wiring within the unit or in the switch can prevent the disposal from operating. This typically requires inspection and repair by a qualified electrician or technician.


      8. Clogged Disposal: If there is a significant clog in the disposal, it may prevent the blades from turning, even if the motor is working. Clearing the clog may resolve the issue.


      Always prioritize safety when dealing with electrical appliances and plumbing fixtures. If you're unsure or uncomfortable with any steps, especially those involving electrical components, it's best to consult a professional. If basic troubleshooting doesn’t fix the problem, the disposal may require professional repair or replacement.

    Educational Center

    The Complete Guide to Refrigerator Repair: Typical Problems & Easy Solutions
    By Sumayya Tingat 11 Mar, 2024
    Discover common refrigerator problems and quick fixes with our ultimate guide. Learn troubleshooting techniques to keep your fridge running smoothly.
    Expert Tips: DIY Appliance Repair Guide for Every Homeowner
    By Sumayya Tingat 02 Mar, 2024
    Discover expert tips and essential DIY fixes for common household appliances in our comprehensive guide. Learn how to safely troubleshoot, diagnose, and repair appliances, saving time and money for homeowners.
    Efficient Dryer Repair Solutions: Key Tips and Troubleshooting Techniques
    By Sumayya Tingat 13 Feb, 2024
    Discover expert tips and troubleshooting techniques for efficient dryer repair. Learn how to diagnose and fix common issues, from heating problems to drum imbalance, ensuring smooth operation and saving time and money.
    Our Blog
    Share by: